How to Draw Gesture
Worth wild to check out and tune in; even if you already know what a Gesture Drawing is.
Wednesday, June 26, 2013

Sunday, June 16, 2013
Work in Progress.
I'm working on the layout for a Table Top Game that I had been working on. I started the project 9 years ago, and it has been done for 3 years and just sitting on a shelf while I got life after College to a stable point. Life is stable so now it is time to move on it. The game is a Table top RPG and will have everything you need to play the game in one book, that being said I wrote enough stuff for it for 3 books. So i am distilling everything down for one book.

Anyway, I am also working on the art direction of the game. The game itself is simi-serious high fantasy fair. However, having played rpgs since high school I know that the players will bring whatever mood or attribute to the game they want, no matter what the game designers intent was. I am experimenting with a styles and I think I have found one that works. Its not like the art work that you find in games like D&D and is much more closer to a style like Joann Sfar's Dungeon (or Donjon if your french).
Anyway, here is the first piece that I worked up for the game that i plan to use as a header for the Monster/Creature section of the Book.

Wednesday, June 12, 2013
Moving Forward and Upward
It has been a while since the last time I posted on the blog. A lot has been going on. I did several tests to work on an animated series. Still waiting to hear back about that. I am working 2 freelance jobs at the same time and doing about 16-18 hour days. I am doing final layout on the Table Top RPG I designed and that has been sitting a while waiting for me to drag all the setting info into it. At the same time, I am creating all the art work for it.
Currently, I am finishing a storyboard gig and waiting to hear back about any possible changes. While i wait I doodle. Check it out:

Currently, I am finishing a storyboard gig and waiting to hear back about any possible changes. While i wait I doodle. Check it out:
Monday, April 8, 2013
Painting Time
Here is a painting I did for a friend's birthday. She really likes Adventure time (Don't we all), and she seems like the person who would paint a little bunny - you know if it was safe and stuff.


Friday, February 8, 2013
Update! and more sketches
Things have been picking up around here. Been busy. Which I love and hate at the same time. But its never a problem when it is something you love to do.
Anyway, Here is a turnaround for a character I am working on for a storyboard;
Also here are some recent sketches:
There is a guy at intel who has long hair and a long beard, and it all blends together really well. Here is a sketch of him:


Anyway, Here is a turnaround for a character I am working on for a storyboard;
Wolf Girl Character Turnaround from Skull Dixon on Vimeo.
This is a simple turnaround for a paleo- era cavegirl for some storyboards I'm working on. I decided to go with a Pen Ward look.
Also here are some recent sketches:
There is a guy at intel who has long hair and a long beard, and it all blends together really well. Here is a sketch of him:
I did this one when I was waiting for my daughter to get done at the dentist office. The office was not very interesting looking from where I was sitting, so I drew my leg and my self drawing my leg.
Thursday, January 24, 2013
Whack a Zombie Not A Mole
The game I helped design and animate is finally done and up for free download. Check it out at the Google Play store. My favorite part about the game is the Face mashing animate I created for it. Makes me chuckle ever time. The game was a spin off of the animated short we worked on during 2012.
Whack A Zombie Not A Mole
Whack A Zombie Not A Mole
Wednesday, January 16, 2013
The Making of a Goblin
This time around I wanted to share my working progress for creating a comic page for my web-comic series "Goblin Tale". Over the last few weeks, I have been refining and finding quicker ways to tighten down the progress so i don't spend all day working on a single page as I did in the past.
The first thing I do is work out a rough sketch of the page and the section of the story that that page will contain, which is all done within a homemade sketch book I have that is labeled, "Goblin Tale: Deadly Notes". I try to keep all my Goblin Tale sketch inside this book. Some times I don't have a clear Idea of what I am looking for as far as page layout and have to do several until I find the one I want. This page is a full splash page.


The first thing I do is work out a rough sketch of the page and the section of the story that that page will contain, which is all done within a homemade sketch book I have that is labeled, "Goblin Tale: Deadly Notes". I try to keep all my Goblin Tale sketch inside this book. Some times I don't have a clear Idea of what I am looking for as far as page layout and have to do several until I find the one I want. This page is a full splash page.

AS you can I add little notes along the side for various reasons, like explaining what a series of lines are suppose to look like in the end. This is one of my favorite sketches because it has so much expression and Rhythm. Once I sit down to make the larger cleaned up version, some of this is lost. This does not happen all the time, but this time I feel it did.

So here is the Clean version. Its not super clean and you can still see some of the construction lines. This is because there is no reason to make a fully clean version of the page if all I am going to do it digitally ink it on the computer. I decided to change the idea of the thick old vine into a interesting looking tree.

here I have scanned the clean sketch into Photoshop and have inked it. I use the pen tool which I then tell photoshop to stroke with the Brush tool. In order to do this you have to have the brush you want selected under the brush tool first or you could end up with whatever brush you used last. The command to stroke the pen line you've created is found with the pen tool selected and clicking the Right button on the mouse. There will be an option for Stroke. I use a separate layer from my sketch to do all my inking.
Once this is done, create another layer and name it color. I set the mode for this layer to Multiply and then go back to the Inked layer. I select areas of the Inked layer that will have the same base color with a wand tool. The I go to Select at the top of the screen and then to Modify, then Expand. I expand the Selection I have to about 2 points. What this will do is when I go back to the Color layer, the color I drop into those selected areas with the paint bucket will go passes the lines I have drawn and this way no white shows through. This use to be the longest process for me until I found this trick. Once I have all the base colors laid in, I use the brush tool to add different shades and textures to the background. The end result will look like this.
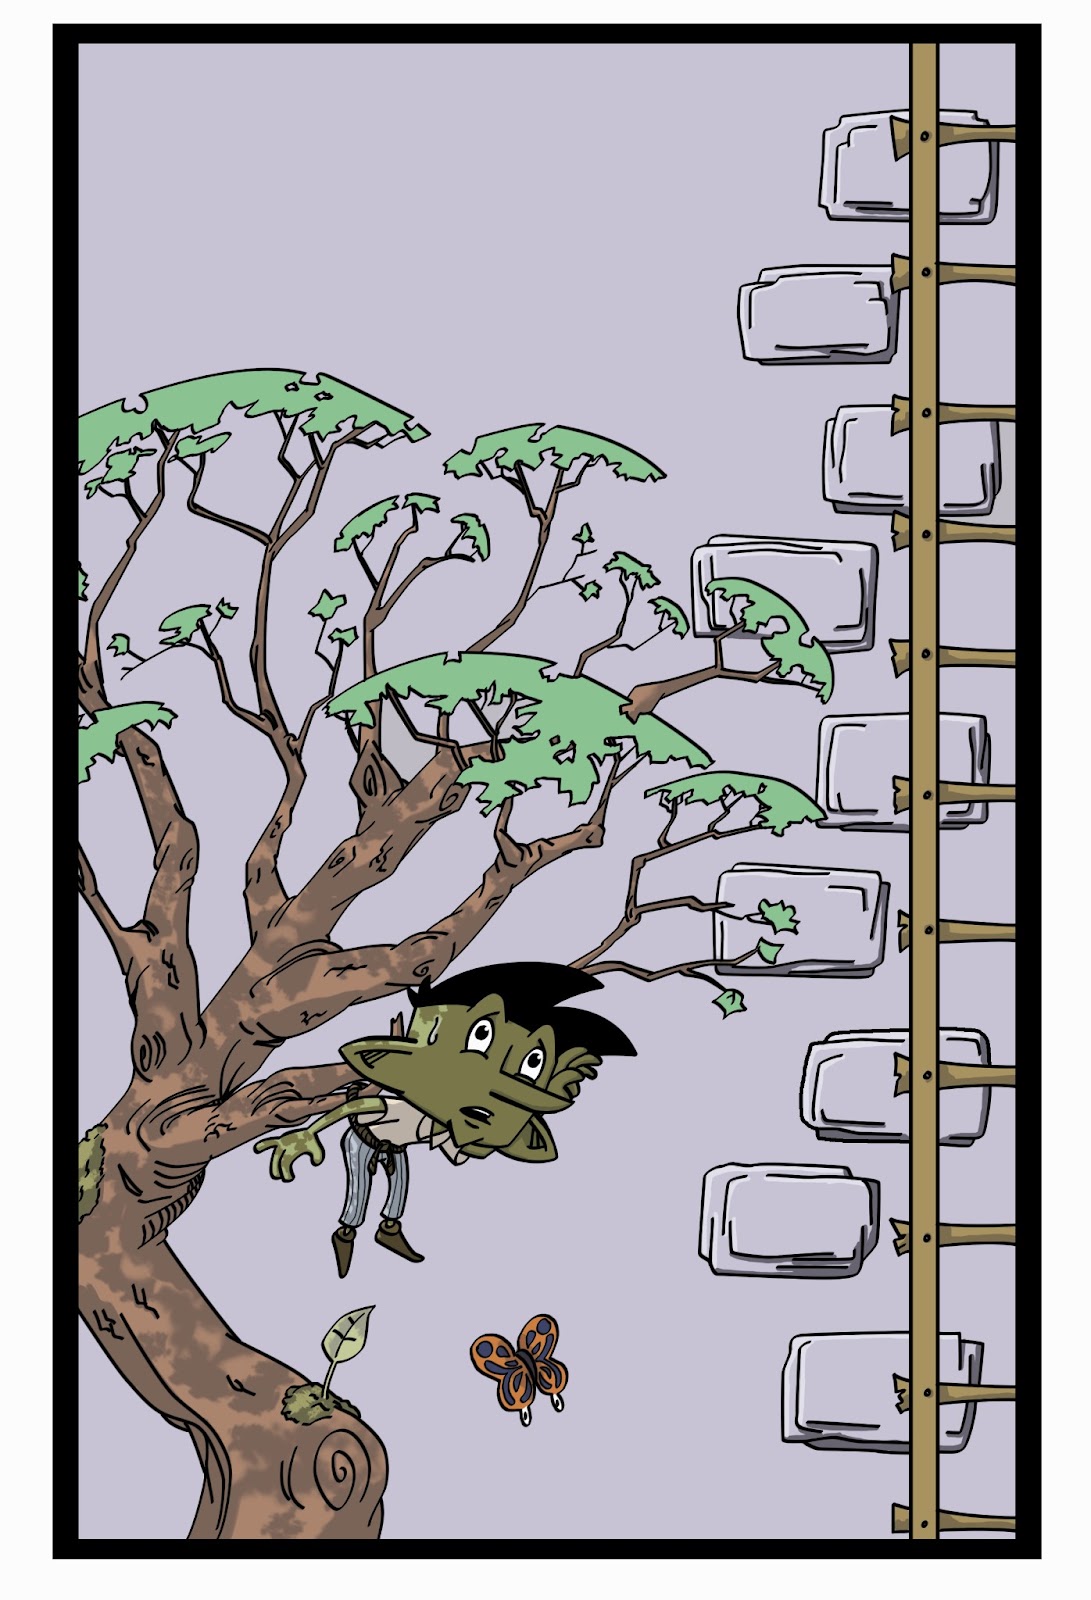
Then I begin to lay in the shadows as a separate layer, set to Darken and with the opacity turned down. I usually don't want the shadows to over power the scenes. To speed up the process I made a selection of everything that would cast a shadow on the wall and then laid in a dark purple to the shadow layer within the area of the selected area. I shift this over until it is where I want it and then for this one I also used masking to delete all the shadow from the areas I didn't want it to cover so it appeared to be behind the Tree and the Goblin.

Once I have this done I save it all as a PNG and open the the file in Illustrator. Here I drop in my pre-made word bubbles and lay in the text.The final result looks like this.

The process is not perfect in any way, but I'm working towards finding better and faster ways of doing this. One avenue I am looking into is using some other software other than Photoshop. Recently I have been lead to believe that I would be better off to use a cheap painting software, "Artrage". So when i try this software out I'll be sure to post about my experience.
Subscribe to:
Posts (Atom)